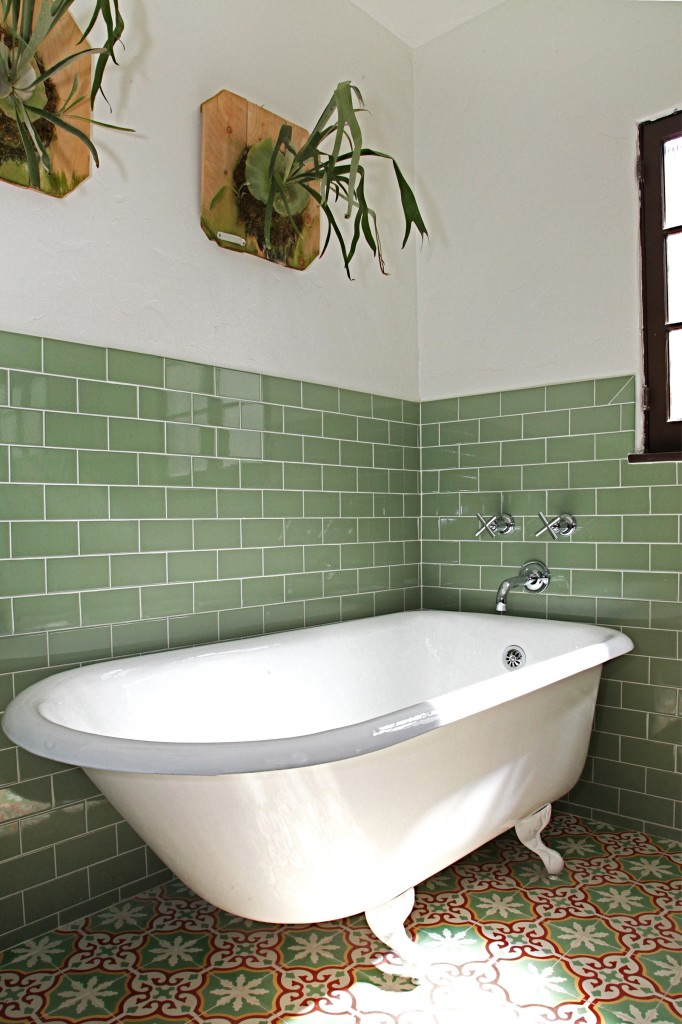
Tiling the walls of your bathroom, whether a guest room or the master, can boost the style of the space and add an extra protective layer to combat moisture damage and mold growth, and to enable easier clean up. Cement tiles are great materials for bathrooms to add a pop of color, pattern and durability.
Cement tiles are also fairly straightforward to install and can be done in a weekend. If you’re wanting to add some incredible style and durability to your bathroom renovation, follow our DIY guide for installing bathroom cement wall tiles.
Tools and Materials:
- Cement wall tiles
- Thin set adhesive
- Grout (preferably light colored; dark colored grout may stain tiles)
- Grout release
- Cement Penetrating Sealer (one of the best is STAIN-PROOF from DryTreat)
- Trowel
- Paintbrush
- Grout float
- Sponge
- Carpenter’s pencil
- Level
- Gloves
- Wet tile saw
- Power drill
- Backer board
- Tape measure
- Galvanized screws
Step 1: Procure your Tile
Start by measuring your bathroom wall to determine the amount of tiles you need. Multiply the wall space by the number of tiles per square foot for the particular type of tile you’re planning to use. For example, let’s say your bathroom wall is 5’ x 10’, so you have 50 square feet to tile. The tile you decide to use is a 6” x 6”, so there are 4 tiles per square foot. When you are ordering your tiles, you want to order 50 square feet x 4 tiles/square foot = 200 tiles. Be sure to order 10-15% extra to have replacements in case any tile gets damaged or there was a slight mistake in the measuring.
Step 2: Prep the Walls
Cement wall tiles can be applied on dry wall, plaster, cement block or cement backer board. You want the surface to be smooth, clean and dry, and for any chipping paint or holes to be sanded and patched. If you need to create a new surface for the walls, begin by measuring the area to be tiled and cut the backer board to this size. Cover the area with adhesive and attach the backer board to the wall.
Step 3: Determine the Tile Layout and Make a Layout Tool
When figuring out the layout, the rule of thumb is to figure out the placement of tiles and the center point that will result in the largest size of cut tiles, avoiding any slivers. If you’ll be incorporating an accent tile or edge tile, figure out where this will go on the wall.
Create a layout tool to figure out the placement of the tiles. Cut a piece of wood just longer than half of the length of the wall, and place tiles along the wood, including spacers, and mark them. Using this tool, you’ll be able to see the placement of tiles by moving it horizontally along the wall. If the ends result in small pieces, then adjust the center point on the wall. Mark on the wall, from the edge, where the first full sized tile will start. Using the level, draw a line from this point up the wall.
Now, do the same process for the vertical side of the wall. Mark the start of the bottom row and mark this line along the horizontal wall.
Step 4: Install the Datum
Now that you’ve determined the layout for the wall tiles and you’ve checked for pipes using a pipe detector, you’ll screw in the long, skinny wooden datum boards (which will act as your reference lines) along the horizontal and verticals lines you drew, to guide you on where exactly the tiles will go to create an even, symmetrical installation.
Step 5: Mix the Tile Mortar
The type of tile adhesive or mortar you use will depend on the type of wall you’ll be tiling on, either dry wall, plaster, cement block or cement backer board. Follow the manufacturer’s instructions. Mix the adhesive with water to create a smooth paste.
Step 6: Install the Wall Tiles
Spread the tile mortar using the notched trowel working in small sections, and apply a thin layer of the mortar on the back of each tile before pressing it into the wall. Use the notched side of the trowel to create ridges that will help the tiles to stick better. Be sure to wipe off any excess adhesive or mortar on the tile surfaces as you go, and place spacers in between each tile to ensure the right space for the grout. Complete the first bottom row of tiles and check if they are even with the level. Remove the wood datum planks when you’re ready to install the outer edge tiles.
Step 7: Apply the Grout Release
Once the adhesive or mortar has dried according to the manufacturer’s instructions, it’s time to apply the grout release or penetrating sealer. Cement tiles are porous, like natural stone. You’ll need a grout release or penetrating sealer to prevent the grout from staining the tile.
Step 8: Apply the Grout
Apply the grout over the tiles using a grout float. Do not allow the grout to dry on the tile surface because it can absorb into the tile and stain. Remove excess grout with a damp sponge. Let the grout dry according to manufacturer’s instructions.
Step 9: Seal the Tiles
Once the grout is dry, you’ll want to seal the tiles to protect them.
And that’s how you tile your bathroom walls using cement tiles! For more information or advice for installing your tile project, or for help choosing your cement tiles, contact the team at Granada Tile.


