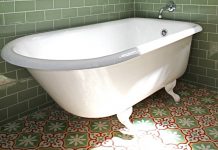
A while back, we shared Granada Tile‘s brand new tile installation video with you, featuring Guy Vidal, of Design Vidal, taking us through the steps involved in installing cement tile in a bathroom. It’s a great overview and visual, if you’re about to take on a cement tile installation project yourself. For some of us, though, getting the scoop in an easy-to-digest written form helps too, so today we’ll break it down so you can be off and running. (Please bear in mind that these general guidelines as suggestions to installers. Since applications and job site conditions vary, the installer is ultimately responsible for ensuring proper installation and sealing of the tiles.)
For materials, besides your tile, of course, you’ll need Thinset Mortar (For light colored tiles, use white color thin-set and for darker colored tiles, use gray color thin set material. Do not use ceramic tile adhesive.); tile spacers (1/16″); a trowel with 1/2″ with semicircular notches; a sponge; a bucket; a wet tile saw with a diamond blade; grout; a grout float; grout release for cement/concrete tiles; penetrating sealer for cement/concrete; a 17″ floor polisher, with sand screen #220, green and white pads.
Next it’s time to get to work. First, you’ll need to prepare your surface. Make sure it’s a perfectly level, clean, dry and slightly rough surface in concrete. It should be 3/4″ inch below the desired finished floor height (5/8″ for the tiles and 1/8″ for the mortar.
The concrete slab surface needs to be completely dry before you begin installing the cement tiles. Never lay your cement tiles directly on to fresh, uncured concrete. If you don’t allow your surface to dry all they way, the moisture in the concrete will evaporate through the tiles and cause powdery white limestone deposits called efflorescence.
IMPORTANT: Some slabs may continue to release moisture on the surface even after fully cured. Test your slab by taping a small piece of plastic (polyethylene film) to the area to be tiled. Make sure all edges are thoroughly taped down. If moisture accumulates on the underside of the plastic, you should apply a waterproofing membrane before proceeding with the installation.
Also keep in mind that your substrate—and the earth itself moves and expands and contracts. To prevent cracking or fracturing, be sure to include expansion, construction, isolation, contraction, generic and perimeter joints where appropriate. To learn more, definitely consult your architect or engineer.
You can install cement wall tiles over drywall, plaster, cement block, cement backer board (for moist areas). As with installing cement floor tiles, the surface should be flat, smooth, and dry and any loose paint or cracked surfaces should be scraped off and patched. Use thinset behind the backer board, not to adhere the backer board but rather to fill voids beneath the backer board.
Once you’ve gotten your surface prepared, next comes a fun part. You get to decide on your cement tile layout. Put them in position before installing them to make sure you’ll like the finished product. For a traditional carpet-style floor tile pattern, start with the center pattern, then lay down the border tiles. Finally, lay down the outside tiles and cut them to fit using a wet saw with a diamond blade.
Now, using a sponge, wet the back of the cement tile completely to enable the thinset to adhere to the tile. For more complete instructions, follow the thinset manufacturer’s guidelines for laying floor tile. Then you’ll want to evenly apply the adhesive mixture to the floor subsurface, using a trowel with 1/2″ with semicircular notches. Be sure to cover the entire back of the tile with thin set material. Make sure you always brush the adhesive in the same direction, otherwise air will be trapped and the tiles may lift up.
You’re then good to start laying the tiles. Use the 1/16″ tile spacers to separate each tile and with nothing more than the palm of your had to press the tiles into place and to ensure that they’re level. (If you use a tool, such as a rubber hammer, micro-cracks will start to appear over time.) It’s very important too to remember and to check that the tiles remain perfectly level throughout your tile installation process, as they can’t be polished down as materials such as marble or granite.
As you install each additional tile, move the tile back and forth to that the new one is level with the first you installed. Bring them together to a grout joint of 1/16th of an inch and continue laying them until all tiles are set in place. Take care and Immediately clean thinset or mortar off the face of the tiles. The longer you leave it, the harder it will be to clean it off. By the same token, don’t let thinset or mortar dry on the face of the tiles or it will be very difficult to remove without damaging the tiles.
Finally, let the thinset mortar dry completely, usually 2 – 4 days, before grouting.
Stay tuned for more as we share with you how to grout and seal your new cement tile surface.
[subscribe2]


