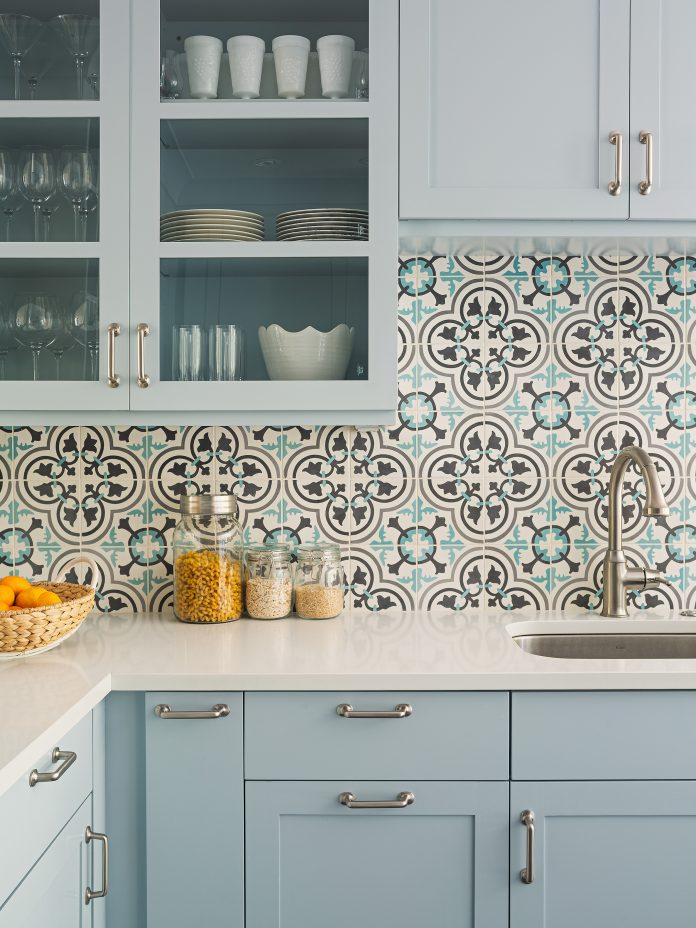
Cement tiles are a popular choice for kitchen backsplashes for their many unique styles and ability to protect the walls from splashes and spills. Liven up your space with colorful patterns and mosaic designs, and add durability and efficiency to your kitchen with cement backsplash tiles.
Below, we’ve created a step-by-step guide to help DIYers tile their own backsplash.
Tools:
- Notched trowel
- Sponge
- Bucket
- Wet tile saw
- Drill with mixing attachment
- Level
- Tape measure
- Latex gloves
- Tile spacers (1/16”)
Materials:
- Backsplash cement tiles
- Thinset (not ceramic tile adhesive)
- Trowel with ½ semicircular notches
- Grout (light colored)
- Grout float
- Grout release (or use Penetrating Sealer) for cement or concrete tiles
- Penetrating sealer for cement or concrete
Step 1: Procure your Tile
Start by measuring your wall to determine the amount of tiles you need for the backsplash. Multiply the wall space by the number of tiles per square foot. For example, let’s say your wall is 4’ x 10’, so you have 40 square feet to tile. The tile you decide to use is a 6” x 6”, so there are 4 tiles per square foot. When you are ordering your tiles, you want to order 40 square feet x 4 tiles/square foot = 160 tiles. Be sure to order 10-15% extra to have replacements in case any tile gets damaged or there was a slight mistake in the measuring.
Once you receive your Granada Tile, you are ready for Step 2.
Step 2: Prepare the Space
First, prepare the space you’ll be working in for the project. Turn off the power in the kitchen and remove anything on and near the wall that will be tiled.
If there are any dents or dips in the wall, fill them in with a joint compound and let it dry and smooth it out.
Step 3: Layout the Backsplash
You can start by placing the tile across the wall to get a feel for the best place and way to install it. Mark your starting point and end point so you’ll know how much tile to use and where to position them. The starting point is the most viewable area and you’ll work your way upward and outward from that point. To see where the tiles will end up at the top of the wall, create a jury stick by marking a straight board with the tiles and spacers to create the vertical layout. Hold the stick up against the wall to check the layout. If there will be tiny sections of tile at the top, you can adjust the layout and redraw the reference line.
Step 4: Cut the Tiles
Before you apply the thinset and while you are dry-fitting the tiles, make the bottom row and end cuts using a wet tile saw to avoid cracking and chipping the cement tiles. If you need to make any top-row cuts, sized-to-fit under cabinet cuts or other special cuts, it is best to do those right before you’re going to install them.
Step 5: Apply the Thinset
Thinset is an adhesive mortar made of cement, fine sand and a water-retaining agent. It’s a good idea to wipe the back of the tiles clean and damp to allow the thinset to properly absorb, and then apply a layer of thinset to the back of the tile. To prepare the thinset, you’ll need a bucket and water. Use white thinset if you’re using light colored tiles, or gray if you have darker toned tiles.
Work in small sections when adding the thinset on the wall, using the flat side of the trowel to apply the thinset and the notched side to spread it and create even grooves.
Step 6: Lay the Tile
Lay the first piece of tile onto the wall with a slight twist to secure it, and leave a 1/8 inch gap to allow for expansion at the counter. If there is a vertical border row, start there first and put a spacer at the bottom. If there is no border, start with the bottom row at the center mark. Repeat the process working in small section and use spacers in between the tile to ensure even spacing and allow for expansion. When it comes time, measure and cut the corner and top tiles, and set them in place. Wipe any excess thinset off the tile surfaces as you go with a damp sponge.
Step 7: Pre-Seal Prior to Grouting
For cement tiles, it’s important to seal the tiles before you apply the grout because they are porous and can absorb the grout and stain. Wait for the thinset mortar to dry completely, and then wipe the impregnator/penetrating sealer (grout release) on the tiles. Wait at least three hours to apply the grout.
Step 8: Apply the Grout
Unsanded grout is usually best for tiles with narrow grout lines. (Sanded grout can be used for larger grout lines above 1/8 inch.) Spread the grout with the grout float and make sure to remove excess grout from the tiles with a damp sponge.
Step 9: Seal the Tiles
Allow the grout to dry completely according to the manufacturer’s instructions, which takes anywhere from 24 hours to 3 days, and then apply the grout sealant to protect the backsplash tiles from staining. Once the sealer is dry, you can add a small amount of caulk to the base of the backsplash where it sits up against the counter.
If you’re ready to order your cement tiles for your kitchen backsplash project, get in touch with our Granada Tile team today. We’re here to answer any questions you have when it comes to installing or maintaining your cement tile backsplash. Lean on our expertise to help you choose the perfect cement tile design and work out patters to match your style. Our Echo, Minis, or Andalucía collections may be right for your kitchen space. Get in touch today!


